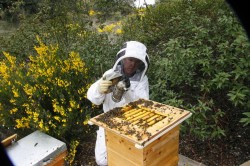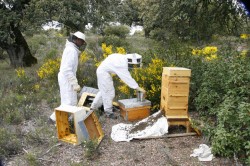
Driving bees to make an artificial swarm.

I tried this method as an alternative to Warre´s method of artificial swarming for the case when:

1) The top box may not have viable eggs

2) Through the windows I can see obvious signs of queen cell construction in the 2nd box.

The Warre method of driving the bees down and leaving the top box on the original site would be a problem as a new queen could be produced. The old queen and the new potential queens would have been taken away to a new site, leaving only foragers returning to the old site with a box of comb and honey.

The method described takes the majority of the colony to the new site with the old queen and little comb. On the old site top two boxes remain with brood, stores and possibly the queen cells. It is populated by some nurse bees who refuse to be driving and by foragers returning to the original site.

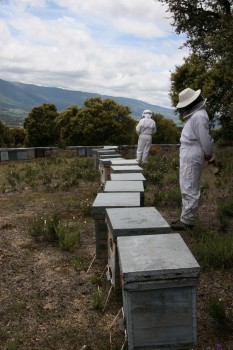
With the use of the lift is very easy, with a minimum of flying bees and the bees easily driven upwards and contained within the hive.

I started from a populous Warre hive with three boxes. The top box full of honey reserves, the middle box with brood and sign of queen cells, and the bottom box with some comb initiated on the top bars.

1st roof and quilt is removed and the top two boxes are raised by the lift.

2nd the bottom box is removed

3rd, the lift is dropped, and an empty box is placed on top of the stack, and on that the previously removed bottom box with bees and a small amount of comb is now placed on the very top.

4th. the bees are driven by a little smoke from the bottom and a few minutes of drumming with sticks on the bottom box of the stack. Most of the bees are driven to the top.

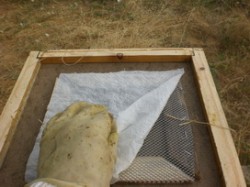
5th. the bottom two boxes of the stack (the original top two with reserves and brood) are left at the site and the upper boxes removed to a new stand, using a mesh on the bottom and top during the transport to stop bees falling or flying out.

6th mosquiteros, quilts and roofs are used to cover both hives.

By the following day there was a regular flow of pollen to both hives. Some feed was given to the colony with the old site as they had no stores, although with the current level of foraging conditions, it would probably have been unnecessary.

Nice conditions so far.

This, our first week, has gone quite well so far.  The temperatures are in the 20s and we have had some good flying conditions.  So far only Thursday has been none flyable (windy from SW).  Miraculously our house arrived yesterday from the USA (//www.kuhnsbros.com/).  Those of you who have been out with us over the last few years will know of our building oddessy and past problems.  Hopefully I can now keep the blog a bit more uptodate as Paul Russell arrived yesterday and has sorted out my WordPress problems.

First trip of the season to Barco

Yesterday we managed a fair bit of flying at Chia, including 4 commercial tandems.  Today, with lighter conditions, nice thermals at Peña Negra, and Ian made a good flight to Barco.  The afternoon we spent doing a little beekeeping and chicken watching.  The evening flight never happend due to the wing going too far east.

A year with Warre Beehives

A decision to go Foundationless

During the winter of 2007/8 I was preparing to make a large batch of top bar hives to move many of my Langstroth colonies to them in the spring of 2008. With modest experimentation during the 2007 season I found I much preferred the bees to construct natural comb. As well as being far cheaper (no need to buy expensive beeswax foundation)and interesting to observe, there were many biological factors indicating it would be preferable to let the bees produce comb in their own way.

There is much worldwide debate on forums as to the benefits of smaller comb size in the fight against the parasite varroa and other bee ailments. When you let the bees free comb what we see are a greater variety of cell sizes. With foundation the bees tend to make the larger celled drone comb in any space they can to satisfy their needs. When let alone there is a smooth transition of comb sizes from workers to drone. Because of the importance of temperature for the brood, the physical distribution of comb and the different cell sizes will likely play an essential role the correct functioning of the colony. Temperature has been demonstrated to influence future activities of the developing larvae. This may be further complicated by larval development in differing cell sizes. (a nice view on the latter can be seen on Dennis Murrell´s (//bwrangler.com/ncom.htm) site.
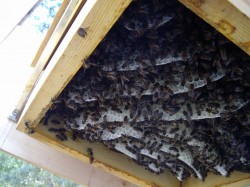
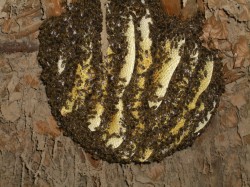
For sure there is a significant benefit for the colony’s welfare if they are in a cavity where the bees can lay out the comb to their own specifications and complexity. The comb is an important structural part of the organism/colony with far greater importance than a simple receptacle for storage and larvae growth. After over 30 million years of evolution of bees have tolerated only 100 years or so of the moveable frame hives heralded as a breakthrough in beekeeping and used today by most commercial and hobbyist beekeepers. In these the colony densities are generally far higher than found in nature, and subject to regular disruptive interventions. It is a testament to bees’ flexibility and resistance that they can survive and thrive under these abnormal conditions, and for that brief period of time (100 years out of 30.000.000 years) have allowed higher levels honey production by beekeepers manipulations.
The advent of colony collapse disorder and the world wide problem with varroa and other stress related diseases has caused a significant hiccup in the industrialisation of the honey bee and many beekeepers are starting to look at alternative ways to keep bees without the use of chemicals to combat the ever more prevalent be ailments.

We do not need to invent new methods, but just rediscover older techniques used effectively for centuries before the advent of movable frame beekeeping. The conclusions of Warre in the first quarter of the 20th century were found by 5 other prominent beekeepers in the eighteenth and nineteenth century (//warre.biobees.com/precursors.htm).

My previous bees

At university I was lucky enough to have as my tutor Dr Lesley Goodman, who gently encouraged me towards bee research but which went no further than my final year paper on the effect of pheromones on conditioning in the honey bee. We had two WBC hives on a balcony on the second floor of the Biological Sciences block in London. After my Zoology degree 20 years have passed until in 2005 we bought a 1 hectare plot of land for our future home and I looked into how I could get bees involved with bees again.

Although I thought I knew a fair amount about the physiology and behaviour of bees, I knew almost nothing of the craft of beekeeping. After reading a number of the standard modern works I purchased 8 colonies in Langstroth (what they call Perfection in Spain) transhumance hives and endeavoured to teach myself how to ¨work¨ these boxes. Those unfortunate colonies suffered far too many inspections and all sorts of manipulations. My woodworking began to be stretched by the huge number of bits of kit for the various manipulations. However, much as I enjoyed pulling frames and watching the bees and admiring the patterns of pollen, honey and brood, I began to think that by following these techniques I was often coercing the bees to behave and work in a manner contrary to their natural development. All standard beekeeping books have long chapters on a wide variety of method of preventing natural swarming. Yet, I found catching and observing swarms the most fulfilling aspect of all. (after my Snelegrove anti swarm method failed to work!). Also my Langstroth boxes needed plenty of scraping of the frames to remove propolis and burr comb. I followed the recommended cleaning routines to keep the frames mobile, but this was causing me a lot of work and the bees far more. Surely there was a good reason the bees wanted to reduce movement and gaps in their hive. I began to be seduced by the top bar hive techniques and then during the winter of 2007/8 I came across David Heaf´s website and read his translation of Beekeeping for all by Abé Warre.

The Warre Hive concept
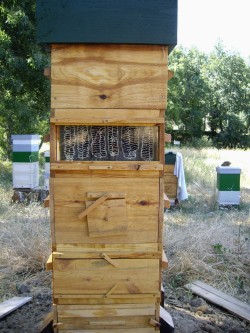
The Warre hive attempts to emulate the honeybee colonies natural nest site (a tree cavity). There are no frames and the bees build natural comb developing downwards as they would in a feral nest, rather than upwards; the direction demanded in most modern hive set ups. There is great emphasis on allowing the colony to maintain its correct temperature by using insulation above the combs and a narrow internal diameter. Intervention is kept to a minimum with the top being opened only once each year at harvest time.

Getting the Warre hives made. January to April 2008

Another nice aspect of the Warre hive is that they are reasonably easy to make yourself. Robbing the bees of some of their honey at the end of the year feels more like a trade when you have personally made their home and taken care that it is well sited.

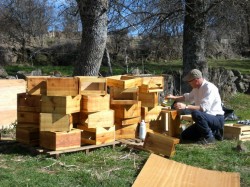
I had over 20 hives going into winter at the end of 2007. With swarming and transference of stocks from the Lang hives I though I would need at least 22 Warre hives. As I have no garden or workshop then my first carpentry efforts took place on the street outside our house. Using hand tools and making plenty of mess and open to the gaze of passers by I struggled for weeks to get the first boxes to sit true.

Our house is very old and was originally the home of a potter who would dry his work in the street and would probably have worked out in the street like myself (though for sure far more effectively!).

It was much harder than I anticipated, and at that rate of production I would never get the 40+ boxes, 22 roofs and 22 floors made. I bought an electric table saw and set it up in the open air in the apiary field (which by then had electricity installed for the future house).

The table saw and a new belt sander made a huge difference to accuracy and speed.

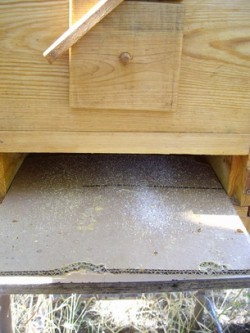
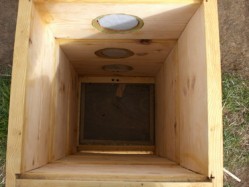
I wanted to incorporate an open mesh floor as I was reasonably convinced of their effectiveness against varroa. I was also distracted by trying various inventions for entry on the base, so ended up making a far more complex base than the original Warre specification but still closed below the mesh to maintain internal temperature. However, I did make a series of standard bases, notably for my Apiary in the hills 15km away which I visit irregularly and for which I would not be able to keep the debri tray clean.
January through to April in 2008 was remarkably sunny and dry (a huge contrast to 2009 so far). My open air workshop is set up at the top end of the field looking towards the south and the mountains. The hives were only 60 metres away and I was often visited by the bees whilst working, especially when painting the hives with a mixture of hot beeswax and linseed oil.
Bait Hives

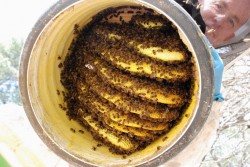
Making regular trips to the local dump to scavenge timber for the build I came across some plastic drainage tubes which provided a quick easy and strong container for bait hives. These I painted inside with beeswax, smeared the entrance with propolis and topped with a Warre top bar grid covered by sacking and waterproofing plastic. The bottom was a piece of plywood, cut to size and stapled into the plastic. These and other boxes I started to hang in trees all over the valley in April in the hope of picking up swarms. At the local land fill I also rescued some old balloon style 16 litre glass bottles which would be useful for mead making later in the year.
A day trip to Springtime conditions.

At the end of Febuary I made a trip across to the other side of the Gredos mountains to start organising the British Nationals later that year (//www.flypiedrahita.com/blog/?p=142)

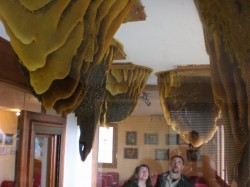
Although only about 50km in a straight line the temperature and floral conditions there on the south side at 600m are dramatically different than here at our 1000m on the north side. We made a visit to Abejas del Valle (//valletietar.com/museodelasabejas/) where Geraldo the owner has a number of colonies freely suspended from the ceiling in his ¨museum of bees¨. At that time in late February the bees were busily foraging on the abundant heather, whilst just 50km to the north at home my bees would have to over-winter for almost two month more before they could expect such abundance.
Populating the hives

In 2007 I had about 15 swarms issue from the first week of May until early June from my hives. Many threw off up to 3 casts, which was probably due to my stimulatory feeding towards the end of March. By April I had finished all my Warres hives, and was eager to get them populated.

Most beekeeping books from the early 19th century onwards deal with how to move bees from the ¨primitive¨ fixed comb hives to the modern movable frame hive. In Spanish this is called Trasiego, and would be done from straw skep, or more often from cork, chesnut or oak vertical hives. What I was proposing to do was the opposite, moving my framed colonies to a fixed comb home.
April is too early for removing the bees from their stores and home as there is still too little forage in this area and the temperatures can still drop below 5ºC. However, the bees start to get busy and are bringing in pollen and nectar so I hoped that by making a joining board and placing the Warré below the Langs (with the only entrance through the Warre), the bees might draw comb down into the Warre. Driving the bees down onto this comb would then perhaps be less stressful for the bees than a total transfer to an empty Warre box, also providing the queen with space to lay straight away.

However, this growth downwards was painfully slow. It was interesting to see large clusters of bees (through the window of the Warre) hanging down into the empty box. Sometimes a tight cluster would take up almost half the space of the Warre, but the next day would be absent and no comb had been build. The best indication that these clusters were involved in comb building was when freshly fallen white flakes of wax could be found in the debri tray below. At other times these clusters were perhaps playing some temperature regulation function.
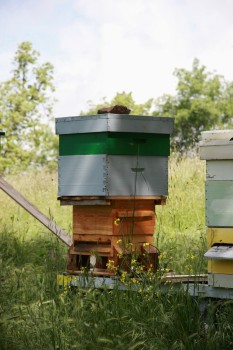
I made most boxes with windows. Some large rectangles right across the box similar to the method proposed by Jean-Marie FRÈRÈS and Jean-Claude GUILLAUME. A quicker method I found to be to make a round window, though the view was nowhere near as good as the rectangle. These windows have been well worthwhile is helping understand what is going on and when to nadir a new hive box. Also, when showing people the apiary it is far more interesting to show people the interior of the hive than just the activity at the entrances.

As May approached I hung the last of my swarm bait hives (around 15 purpose made for trees plus all the Warres and old Langs around my field). Some of the Langs were growing down nicely into the Warres, but others were resolutely staying put up in the Lang.

More Woodwork

Following David Heaf´s example I made a metal funnel to shake down Lang frames into the Warre (from the roof of an old Lang) and the Hive lift similar to that used by Marc Gatineau. My version was made from scrap wood, pulleys and webbing from paraglider risers.
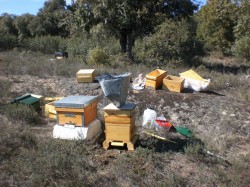
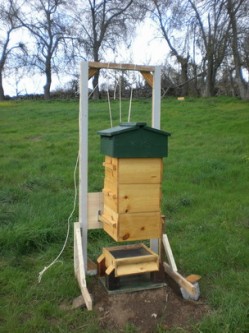
June. Still no swarms.

I only got to see one swarm from my Hives at the beginning of June and that perched right at the top of an ash tree well beyond the reach of my ladder. It went within the day ignoring my many bait hives!

May 2008 was the worse on record in Avila for over 100 years for rainfall and cold weather which is likely to have kept them from swarming. Any good day for swarming, with warm conditions and light winds I had to work on the mountain flying cross country with my groups, so had less chance of seeing swarms leave or catching them.

My final tally for catching swarms in the bait hives was only two. One in an old framed hive, and one in one of the drainage tubes I had adapted which I had placed in a tree between Villafranca and Navacepadilla.

I really wanted to get the Warre hives up and running so decided that I would transfer most of my Lang colonies to the new Warres.  This would involve driving all the bees out of the Langs, by shaking the frames either through the funnel into the Warre, or onto a cloth infront of the new Warres.
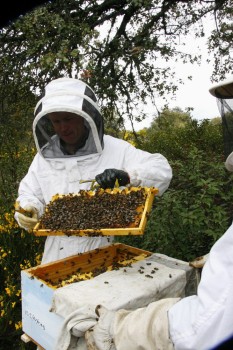
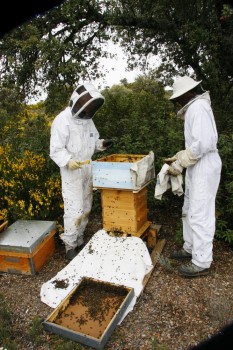
The pictures above show the way I did it with colonies over a transfer board. The old queen and most of the colony went to the new Warre hive. The old langstroth with frames, brood, stores and covered with some bees were moved to another site. A bowl of cut comb honey, cut from some of the frames,  was placed on the floor of the new Warre within an extra empty box with no top bars. When this was used up the hive was lifted and the bowl removed.
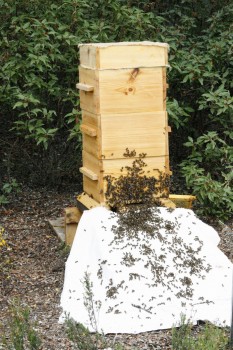
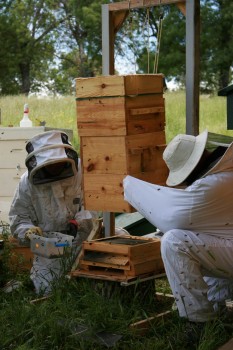
Later in the year those hives which had the lang removed when some comb (and brood) had already been made below the transfer board had a quite high level of Varroa.  Langstroth colonies which I droves straight into an empty Warré without any comb fared much better as the brood cycle of bee and varroa mite was interrupted.

Although spring was very wet, the summer was the usual hot and dry Avila summer.  On the few poor paragliding days (wind too strong) then I often visited the apiaries to show our guests the bees and to check on their development.

As the comb grew towards the bottom of the lower boxes, more boxes were added below using the hive lift. I never needed smoke for this, the bees remaining quite tranquil, and also I was able to examine the comb from below as well as through the windows.

As is always the case some colonies flourished, and others grew slowly. Checking the back windows it seemed that in at least two colonies I would be able to harvest a box of honey that season.
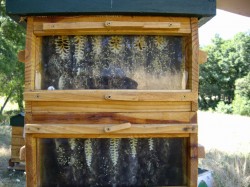
My paragliding work finishes at the end of September, so that is when I normally do the bulk of my honey collection. This is the only time of the year when the top is removed, when most of the bees are further down the hive with the brood. The honey is stored above the population, which acts as a heat sump and insulator. As the winter progresses the bees winter cluster will progressively move up eating the stores. We must be careful to leave sufficient stores above them to allow them to get though to spring and start their population build up for the new season.
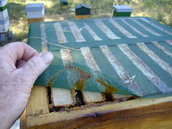
I made a clearer board, which later doubled as a formic acid treatment tray. There was very little interconnection of comb above the top bars and after leaving for a day the removed boxes had fewer than 20 bees in them (these were brushed out with a Storks feather).
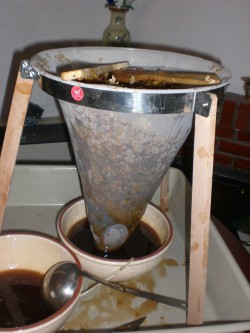
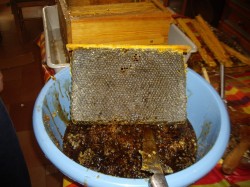
The extraction of the honey from the comb was by mashing up in a plastic bucket then straining through a fine conical sieve. This year I do not have a press, so there was a fair bit of honey still on the remnants of comb. This I fed back to the bees. What is nice to see is that the honey spun from the framed hives granulated quite early into the winter, whereas the Warre is only just starting to so.
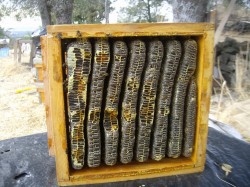
Some of the colonies were only partly developed in one Warré box, since they were the colonies from the Langs which had been moved to another site after having most of their number driven to a Warré in spring. As these were transferred mid summer it was necessary to give them some feed. This I did with standard plastic feeding trays and sugar solution above in September, and with feeding bowls and cut comb below them after their transfer.
After removing the feeding devises and treating 3 of the hives with formic acid that was it for the year.

I have 90 litres of various styles of Mead running from this year’s crop, but have used exclusively honey from my framed hives as I feel the strained Warre honey is too valuable for mead.

Currently I have 11 Warré colonies which have survived the winter and are showing signs of strength at the entrance on warm days and bringing in plenty of polen.  One of my Warré colonies has perished, leaving a full box of honey, and another I am monitoring as it has some entrance activity, but thay may be robbing from other colonies as there are plenty of stores visible through the window.
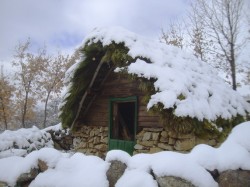
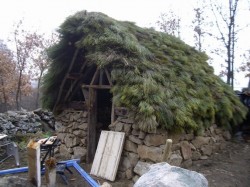
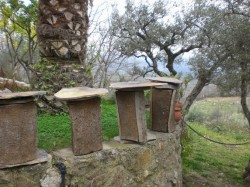
It has been a very rewarding year of bee observing, and quite a lot of hard, though enjoyable work with the carpentry. I have been held back from starting this year’s production of hives as I have been building a traditional dry stone and thatched building. Its use will be for chickens, but I have a mind to build a traditional bee house used in Castilla y Leon which would be a similar construction. They were mainly to keep the bears away from the hives, but there are no longer bears in this area, so the project can wait a while.

WORLD PARAGLIDING CHAMPIONSHIP 2011 FOR PIEDRAHITA

We have won our bid for the organisation of the World Paragliding Championships in 2011. On Saturday afternoon in the CIVL Plenary meeting in Hall, Austria, we presented our bid against Turkey (Kayseri) and Italy (Feltre).

Our Delegation from Piedrahita included Federico Martín Blanco (Mayor of Piedrahita and Deputy of the Provincial Government of Avila), Maria Carmen Zafra Fernadez (1st Deputy Mayor), and Loli and Pepe. Loli, Federico´s wife speaks fluent German so was involved in convincing the German speaking delegates during the social events. Pepe is the owner of Garrudo the Piedrahita Butcher. He bought along a fantastic acorn fed iberian Ham from Piedrahita, which he carved and served to the delegates during the Airwave party on the friday night . We hoped to give the delegates an taster of Spanish Hospitality. (in the photo from right to left are Calvo, Pepe, Loli, Steve, Maria Carmen, Flip Keotsier -the CIVL President and Federico, the Mayor of Piedrahita)

On Saturday ours was the last of the presentations for the Paragliding Worlds. I opened up briefly explaining our long curriculum of past events (32, including the Europeans in 98 and 4 PWCs). I then introduced the Mayor who spoke on behalf of the President of provincial government of Avila. Then Maria Carmen further endorsed our bid confirming both the commitment of the Provincial Governement and the Town hall.

I then explained a little why Piedrahita is such a fantastic flying area and also a little about task setting. After detailing information about the take off and landing and headquaters I passed over to Calvo to detail our key officials – at this time principally from the highly experienced UK paragliding nationals organising team. Calvo then ran though rescue, the budget and local faciities after which I summed up, closing some seconds before our 15 minutes of permitted time elapsed.

Saturday night we were invited along with the CIVL delegates to a dinner organised by the Austrian Aero Club. This was a very Tyrolean affair with dancers in traditional costumes with thigh and shin slapping. During and after the dinner word got around that we very much had it in the bag, though myself and the Piedrahita delegation were still very nervous………particularly myself, since I have spent months setting up this bid and winning favour with the politicians and securing promises for improvements.

I was present during the voting early on the Sunday morning. The hang glider Worlds bids were first, which had to be re voted on 3 occations to get a majority. Italy won the bid. It was sad for the German and Australian bids, both fantastic tow launch sites. The proposed meet director for Germany was Dietrich Münchmeyer who had done such a good job in some of our Piedrahita events.

Waiting for the counting of the votes for the Paragliding Worlds was a nail biting affair for me. When it was flashed up on the screen it was a huge relief. We had a big mayority. According to Calvo the biggest ever seen.

So, we have the Worlds!. It has been a long ambition of mine to see the World Championships in Piedrahita. I arrived here in 1991, so it will have taken 20 years to get there. Hopefully the commitement now shown by the local and provincial government will finally allow us to get the take off and landing situation fully resolved and access to some other take offs. The Success of this bid should be positive for all pilots of the world who enjoy flying in Piedraita, not just the lucky 150 pilots selected to fly for their nation in two years time.

Traditional construction methods in the Gredos mountain area of Avila.

What I like most about the old mountain villages of Gredos is the way the were made from local materials which were used in simple structures with elegant solutions to common construction problems. Some of these methods unchanged since the time of the Vettons before the Roman invasion. The buildings fit in with the local landscape in sharp contrast to some of the buildings thrown up alongside them in the last 40 years with modern materials and less labour intensive methods.

Many of the simple houses and barns we can see in the area are over 500 years old and conform to a pattern which was effective for the needs of their rural lifestyle in an area of climatic extremes: Long cold winters and hot dry summers.

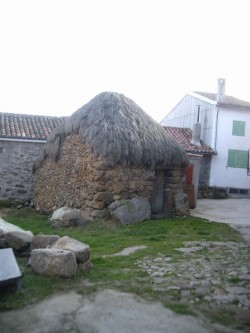
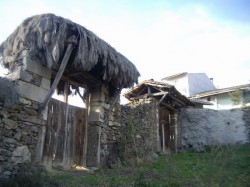
La Herguijuela, some 6km behind take off has a good collection of the classic Gredos houses. The typical Gredos house is made of granite stones, often un-worked and used without mortar. The living area is on the ground floor, and a loft above used for storage. The house is lined up with the mid day sun, with the only entrance through this side and within an enclosed corral. The doorway is generally covered by an extension of the roof, this area normally having a granite slab seat, a Poyo, used for sitting outside and doing the usual domestic work (plucking chickens, shelling peas, mending etc). Going though the door you enter the Mediocasa, often the only room with natural light (through a solitary small window near the door). The doors would generally be divided in two, the top half generally left open for light and ventilation in the summer, with the bottom shut to keep livestock out of the house. From the Mediocasa there would be the Alcobas(sleeping niches), which would be closed with curtains.

At the back of the house would be the kitchen. The wide chimney flue takes up most of the roof of the kitchen. These flues would not generate much upward draught so the smoke would linger about the room. This was considered a benefit, keeping down insect, curing hanging foodstuffs and preserving the wooden beams of the house. This smokey area would be the only warm part of the house in winter. Alongside the length of the house would be a covered stable for livestock, which often had a opening on the north side to throw in foodstuffs. These houses would often be aligned with others sharing the main structural wall.

Most of the roofs are now covered in tile. However, there are still a number in La Herguijuela which have a thatched roof of mountain broom. Of course the mountain broom is everywhere to be seen in Gredos, and farmers have traditionally made great efforts in removing it to increase the pasture. In the remote mountain villages of Gredos it is likely that all roofs were thatched with broom before communications in the last 200 years improved allowing the transport in of tile. There are still a number of buildings in La Herguijuela with thatched broom roofs. Throughout the region and in the Sierra de Francia there are shepherd huts in remote parts made with dry stone walls and roofs of rough timber and broom.
My Project.

I have no experience of building, only an interest in how things are done. What I proposed to do was to make a building using the same techniques which have been used here for at least 2500 years, without the use of cement and using only the materials I could gather locally: Granite, timber and broom. The buildings final purpose was to be a Chicken house, but I wanted to make it to a scale seen in typical chozas found in the Gredos Mountains.
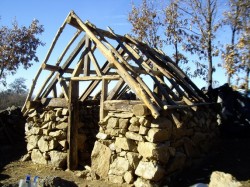
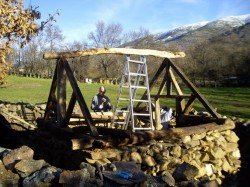
First I made many observations of buildings in the area to see if I could work out the structural methods used to keep them up and hold them together. Building walls without any form of mortar is a technique as old as civilisation, yet I did not know how it was done. I had a theory, and by looking at the remnants of fallen buildings and walls decided it was done by building two walls, leaning in against each other, with the middle filled with smaller stones and some stones bridging both sides to tie them together. Checking the internet confirmed the theory and gave me a little more info and confidence. Many of the Chozas found in Gredos are round. The reason for this is that corners are problematic with dry stone walls. Extra long stones are needed at the corners to tie things together. Finding the right stones near the construction can be difficult. A round building avoids this problems, but at the time of starting the building I could not work out how the forces of the timber of the roof would not push the walls outwards and over. I had some theories and ideas on how to do this with a square or oblong building (using a heavy timber frame resting on the dry stone walls to take the outward forces of the roof spars), so dug my foundations trench as oblong, hoping I would find some decent stones for the corners.

With the walls at about 1.5m high, there is approximately 1 tonne per metre. This was going to be a lot of stone and work, so I did not want it to be too big. Also, there was the possibility that my abilities would not allow me to make it (or I would be bored and abandon the project). However, since the walls needed to be at least 85cm thick at the base, the structure would have a decent width, otherwise would just be a pile of stone with a crevice in the middle.

My source of granite stones was from the pile of earth and stone excavated from our house foundations. Plenty of large stones were visible, and plenty more could be dug out from the pile. To move the larger stones and other hinds on construction without modern machinery I checked out internet pages on how the ancients build pyramids/Stonehenge etc. I made up a sort of skid/sleigh to drag the bigger stones and made rudimentary ramps to ¨walk¨ the stones to the higher courses.

The key to laying a dry stone wall is to place the stones with their longer length inwards. There is a temptation to use the flatter sides for the exterior face of the wall, but these almost always lie along the longer sides in naturally occurring granite stones. To have a smooth outer face considerable carving of the granite would need to be done on the ends (or you could use cement, and it would be easy). It was quite satisfying to assemble the rocks, placing each one like a jigsaw puzzle. My estimation of the ancient Egyptians and Incas with their flawless joins and smooth surfaces was much higher after admiring my knobbly wobbly wall. However, as an imitation of a 16 century local building, I think it would just about pass.

To tie in the stones I laid some heavy wooden beams along the tops, with overlapping notches. These beams I sourced from the local landfill. Some were heavily waterlogged and took a huge effort to move and place. However, from the remnants of old houses, some of the beams probably 100s of years old, I would get my authenticity (and recycling and being cheap!).

My roof structure grew based on the forms I had seen in barns and broken down exposed houses around the area. I was still unsure of how to thatch the roof, and much of the stuff on the internet made things more confusing. However, the Thatcher’s craft (//www.countryside.gov.uk/LAR/archive/publications/thatchers_craft.asp) was a great help. However, these techniques were for long straw or wheat reed. Although I found a page of thatching with broom in Asturias/Spain, they showed the crown of the roof construction to be quite different to this area (//thatch.org/spain.htm) Also, when looking (with the unexperienced eye – from a Thatcher’s viewpoint) at the remaining roofs I could observe it was difficult to understand how it was actually applied and kept on.

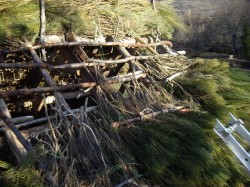
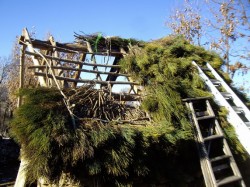
Anyway, after plenty of trips to the local landfills and the occasional downed tree which I came across, I managed to erect the framework of the roof ready for the covering of the broom thatch.

My idea was to use exclusively the broom from the take off which is always in need of clearing. However, the take off was covered in snow, and it took five days of work and 5 vans full of broom to get enough. I soon found that it was excellent material to work with. I used the method of using sways, occasionally backing up with stitching. For the roof crown I laid deep tied rows of broom along the top beam. I was then able to thrust the broom into this tight mass (leaf outwards) to make a good finish without the exterior timber shown on the houses thatched in Asturias.

Either end of the roof, between the wooden supports I had planned to use adobe (mud) bricks which I have seen used to nice effect in the Sierra de Francia. However, I decided it would be a lot easier (less time finding and dragging bricks from the landfill) to use overlapping timber cladding, which is also a common way of cladding barns here.

Because the purpose of the building is to house chickens I wanted some small doors at the back behind the nesting boxes to remove eggs and also some windows to improve their laying in wintertime.

I salvaged from the landfill a classic Gredos Portalon, leastwise half of one. I have yet to make the upper part of the door, but the house is now nearing completion. We have had weeks of bad weather and heavy snow, so I will have to wait a while to make the finishing touches.

The outer walls are called an Ameil, which was historically used for holding the hay after harvest. I shall gate it to make a bit of a pen, though of course any grown chicken will easily jump over it. The chickens shall be fully free range, though we are a bit worried about foxes, as there is a fox run through the lower part of the field, and when crossing, do not seem to worried about our presence.

Getting the hens depends upon also living in our new house. The snow has also held its construction up, so our hopes of being there by May are gone.

Take off improvement plans

I have just recieved from the Mayor the plans and budget for the imrovements at take off. The plans have been drawn up by an engineer of the provincial government, and things look very promising. For the upper launch two graded runs 40 meters wide are planned. These will be covered in GRASS. The wire fence behind will be repalced with a wooden one for greater security. The budget for this is 31.198,34 Euros.

Improvements were made to the take off in May and June of 2008. The take off was graded and covered in small granite chippings. This was certainly an improvement on what we had before, and now with this new project we can hopefully say goodby to snagged lines and damaged gliders.

On the 21st of Febuary the Provincial Goverment, Town Hall, myself and Calvo (Chris Burns) will make our presentation bid for the World Champioships of 2011. This improvement, although integral to having the world championships will go ahead irrespective of our success or not with the bid. However, if we do succeed in obtaining the organisation of the Worlds, we can expect much greater help with respect to take off and landing sites. These improvement will of course be a benefit to all of us who fly at Peña Negra, irrespective as to whether we are World Championship pilots or free fliers. For all of you who enjoy flying at Piedrahita and who wish to see improvements in the facilities here I urge you to contact your national aeroclub delegate and ask him/her to vote Piedrahita/Spain for PG Worlds 2011.

The arrival of the first Storks

Today I spotted my first stork, fresh in from Africa and inspecting the state of the nest on the building behind our house.  It has been a severe winter here, and continues cold wet and snowy, and if I were a stork I would hang around a little longer in Africa.  However, there are so many mating pairs of storks here that the competition for nesting sites is high so arriving early is important.

This time last year was the driest warmest winter ever which led to the wettest spring on record.   This year is the opposite and I predict a booming dry normal spring flying season.  I think many people were frightened of from ever comming out again in May after last year, but this year I hope to we will enjoy the normal top XC conditions we have had in the past.  So, follow the storks example and come early!

I will be making a trip to Andalucia in March.  I hope some of you can join me to get some early season flying in.

2011 World Paragliding Championship bid

For many many years I have been considering a bid to organise the World Paragliding Championship in Piedrahita. We have now had 33 international events here, including the Category 1 European Championships which I bidded for in 1996 and ran in 1998. I think the time is now right, with the resolution of many of the take off and landing problems and the improvement of the helicpoter service to try for the biggest event in Paragliding competitons. With the support of the RFAE and the local town hall the bid will be made in the next CIVL plenary meeting in Austria on the 21st of Feburary. The other two bidders for the event are Turkey and Italy. Both have submitted budgets far in excess of ours, nearly double in the case of Italy, and three times larger for Turkey. However, our proposed entry fees in less (significantly less that the Italian organiser bid) and we hope to have the vote of many of the Nations who have chosen to run their own nationals here in the past, and of the many hundreds of pilots who have enjoyed the epic conditions and tasks in the Piedrahita evens run since 1993. The core of our organisation will be some of the Key personnel of the British Nationals, so some are already naming it the proposed British World Championships in Spain. The Mayor of Piedrahita, Calvo (Chris Burns, UK Nationals MD) and myself will be making our presentation in Hall in Tirol (Austria) in a months time. Wish us luck, and if you have any sway with your National Aeroclub delegate, please lobby on our behalf.

New for 2009 – Themed Weeks

Themed Weeks

This year we are organising several weeks with particular themes:

  • Bird Watching Week: Short walks along the routes where we are likely to enjoy the most common species in the area. Habitats include pinewoods, mountain peat marshes, pastures and scrubland, Pyrenean and Holm oak woods, along mountain streams or the river banks of the Tormes or near rocky outcrops where birds of prey and vultures nest. 8th – 15th April, 530€/week
  • Sierra de Francia Tour : For fit walkers looking for a different and fulfilling experience combined with top quality accommodation. 31st August – 5th September, 620 €.
  • Spanish experience week in Piedrahita : The most affordable way to learn Spanish in Spain and enjoy a holiday in the heart of the country. 15th -22nd April, 470€.